Connect your Google Ads account
Now we’ll tell AdsPing which Google Ads account should receive your conversions. This happens once, inside the AdsPing dashboard. After this step, AdsPing will be able to upload your site’s conversion events to Google Ads.
3.1 — Open the Destinations tab of your pixel
Go back to your AdsPing pixel detail page (Pixels → your pixel) and click the Destinations tab.
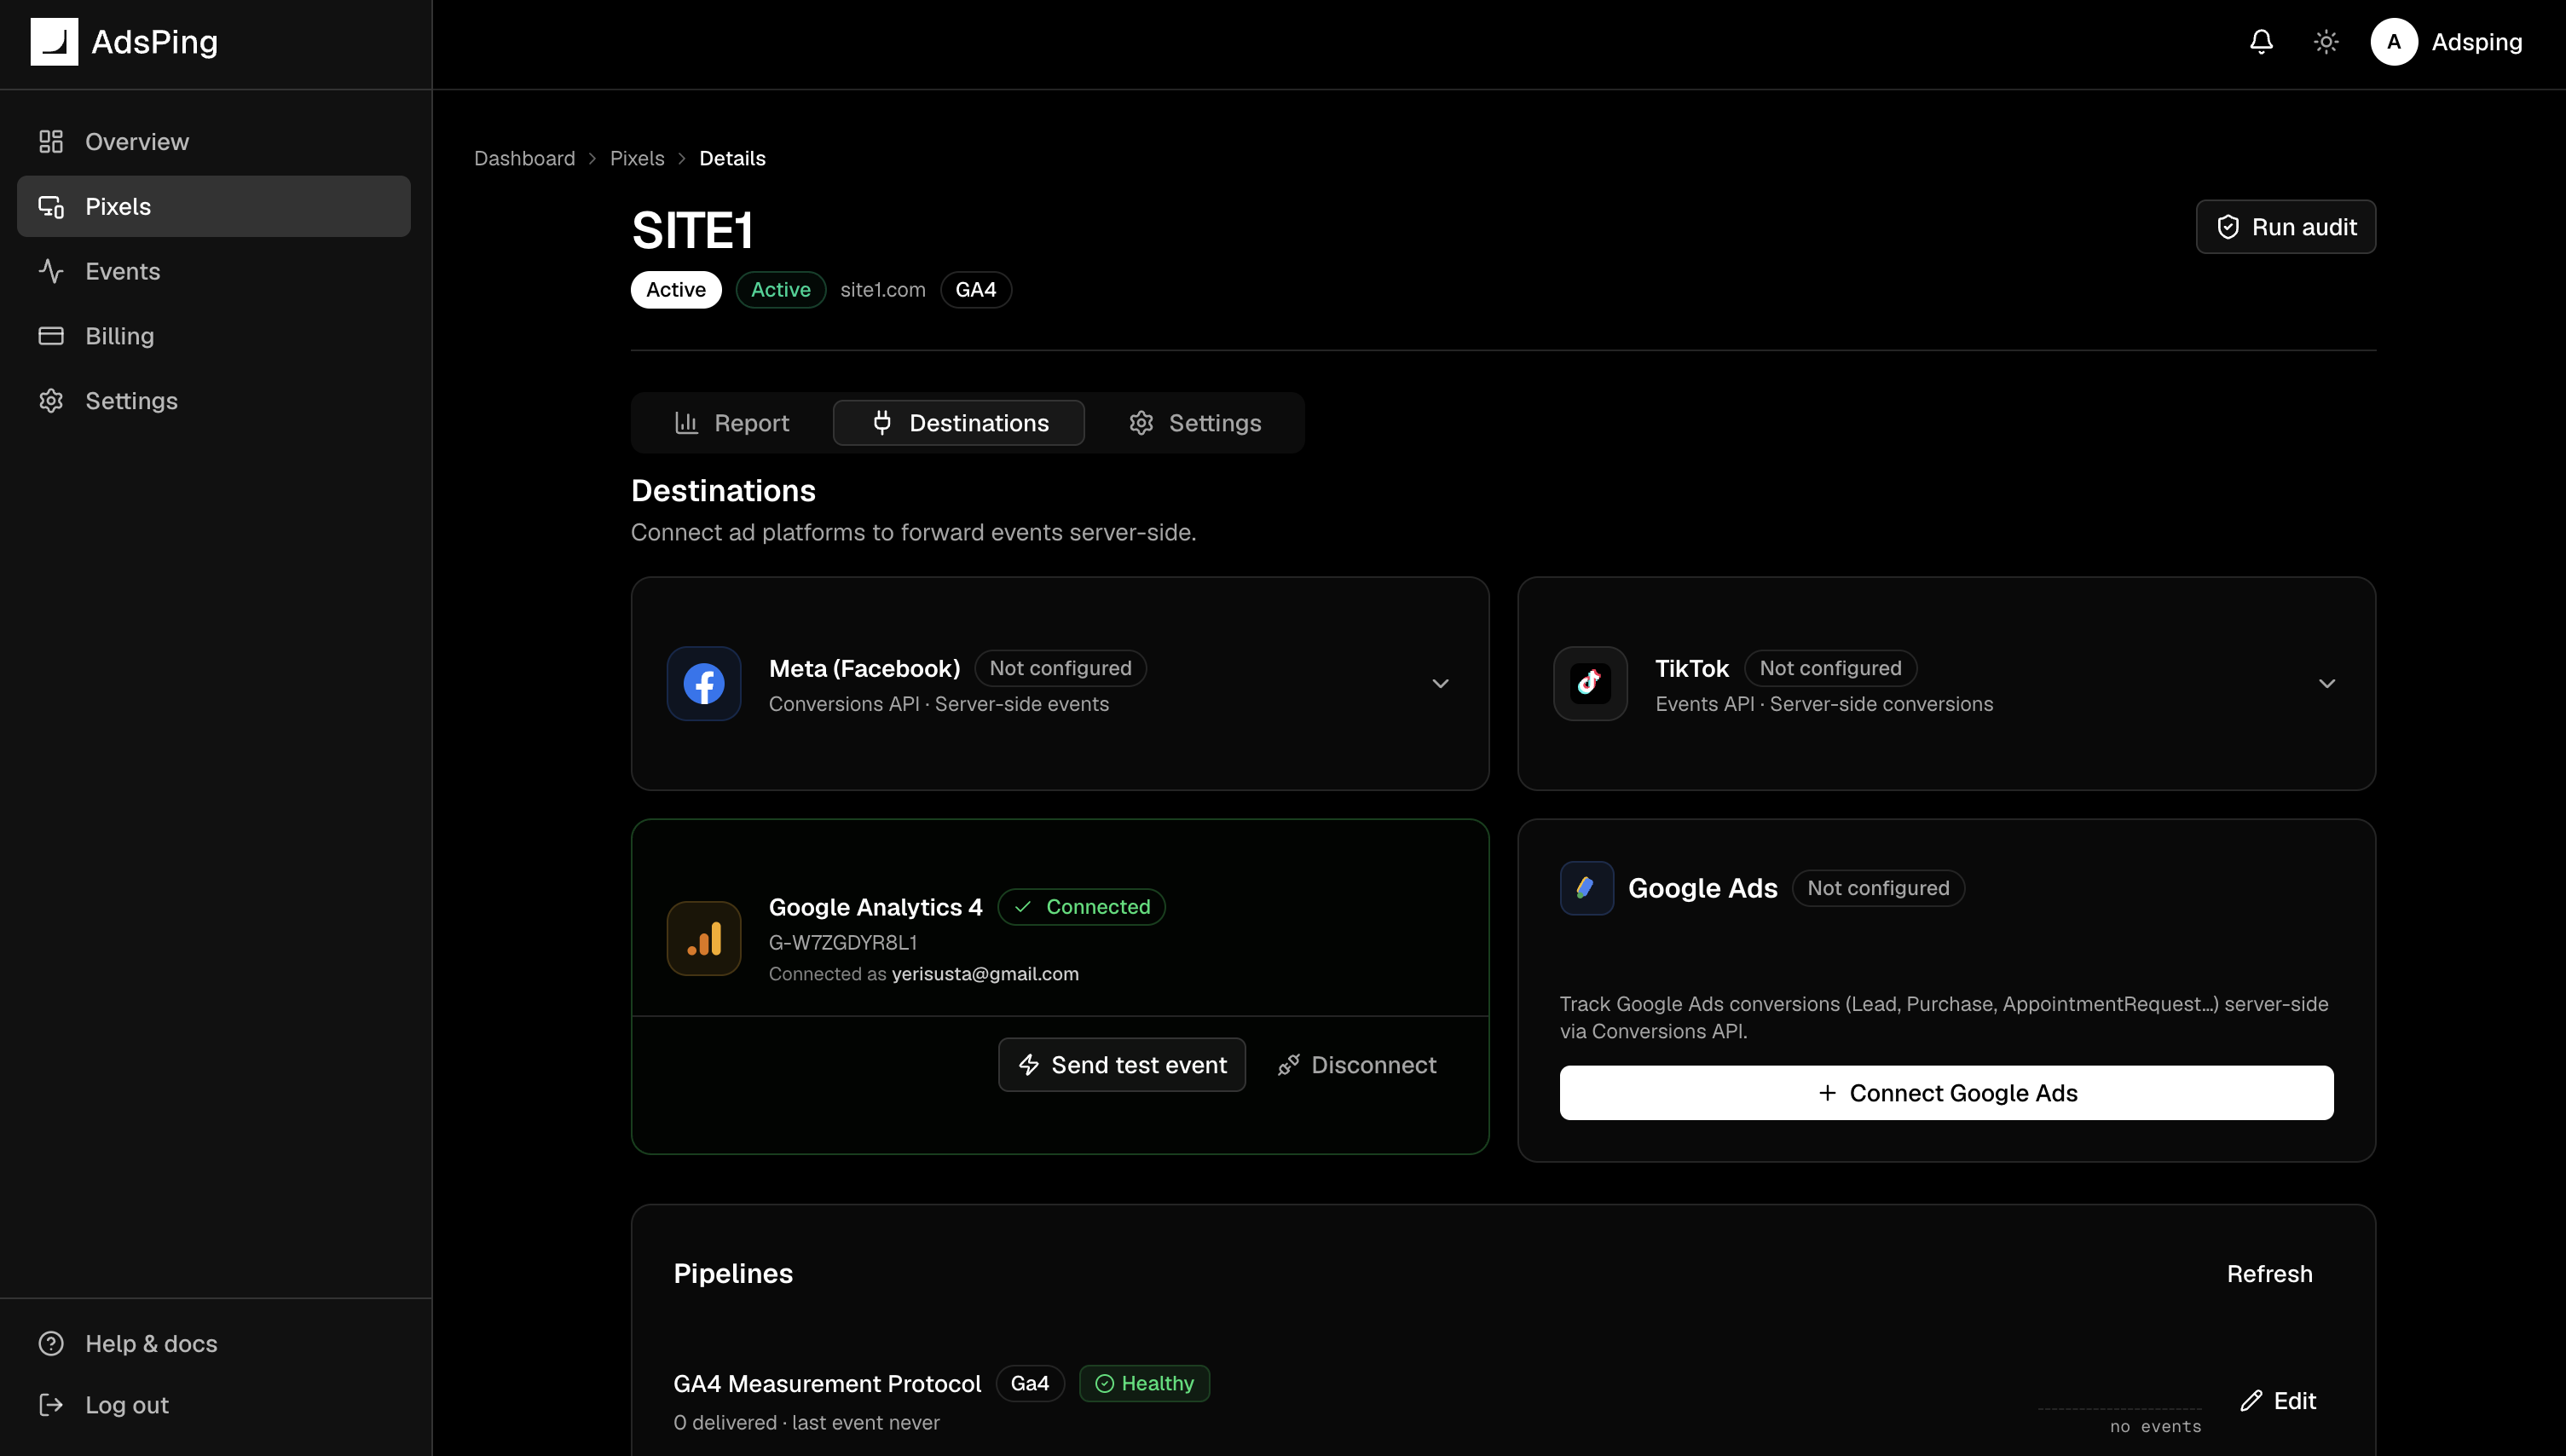
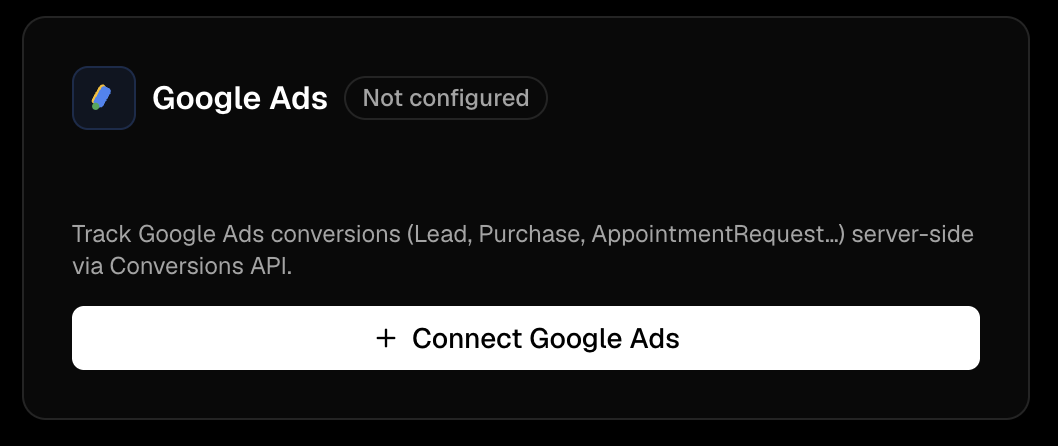
3.2 — Click “Connect Google Ads”
Find the Google Ads card. If you haven’t connected before, click Connect Google Ads.
3.3 — Approve on the Google consent screen
A Google consent screen opens. Sign in with the Google account that has access to your Google Ads account, then approve the requested scopes:
adwords— to upload your conversionsanalytics.readonly— lists GA4 properties (used only if you also wire GA4)tagmanager.readonly— lists sGTM containers (used only if you also wire GTM)
Pick the right Google account.
If you have multiple Google accounts logged in, double-check you select the one that has access to your Google Ads account. Picking the wrong account is the #1 reason this step doesn’t find any Google Ads customer in the next step.
3.4 — Add your first conversion action
After approving, you land back on the AdsPing pixel page. The Google Ads card now shows Set up first conversion action. Click it.
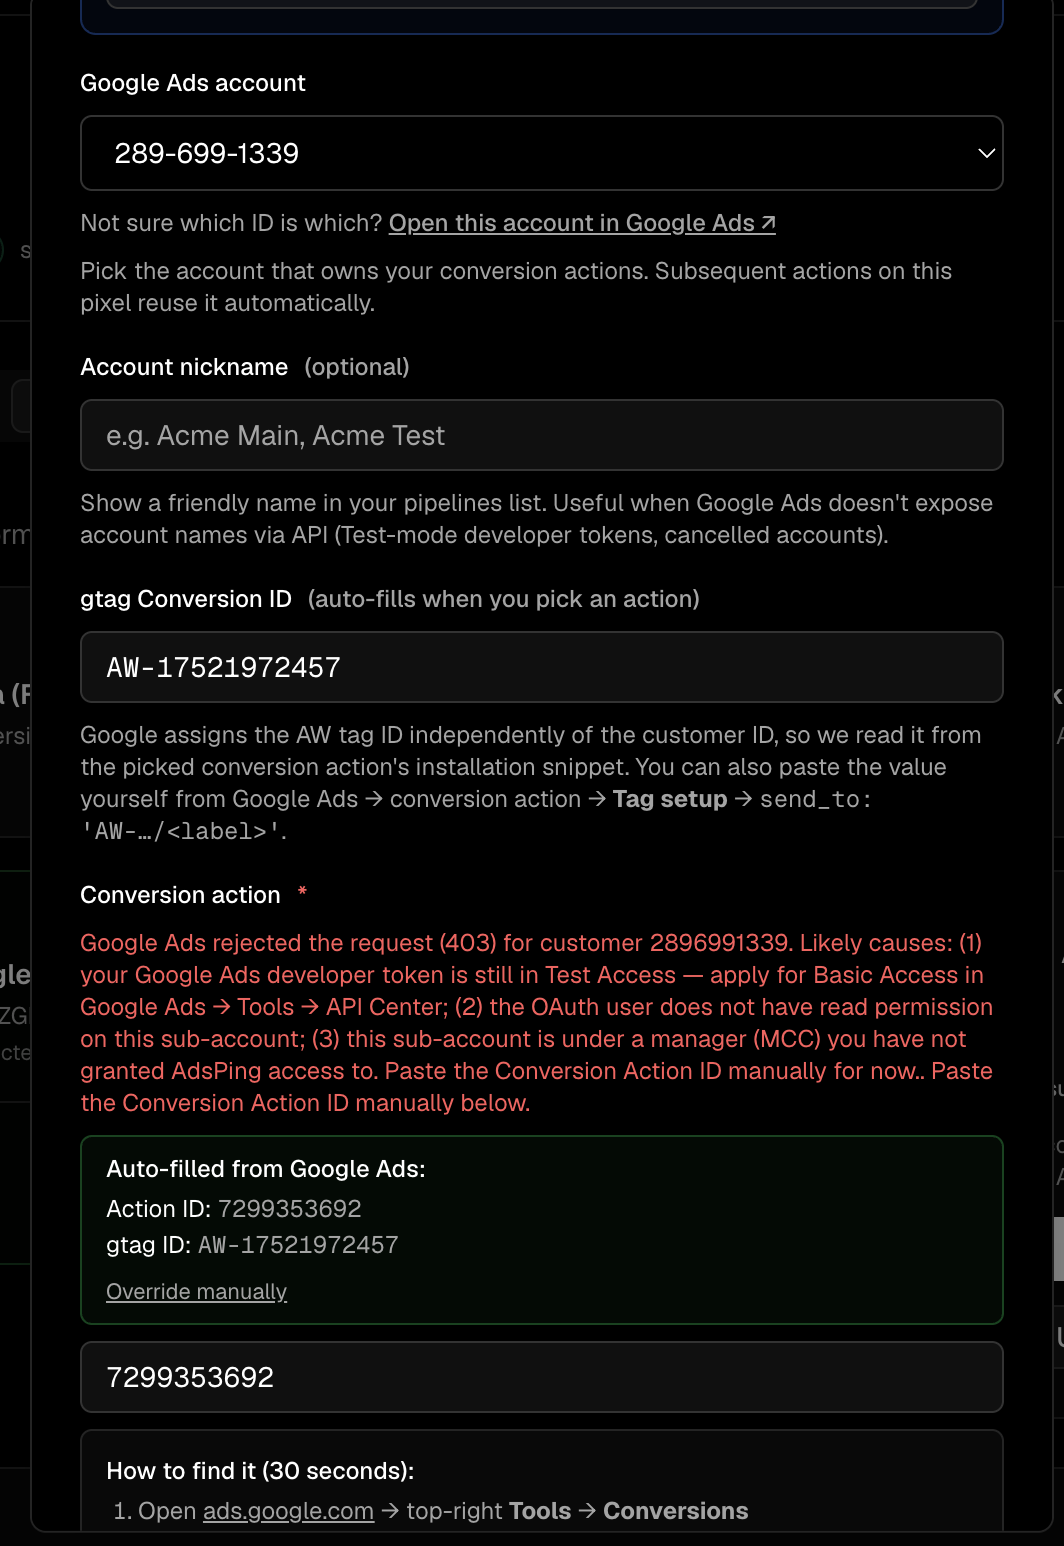
3.5 — Fill in the conversion action form
A dialog opens with three required fields:
- Name — a human-readable label, e.g. “Form lead — Acme”.
- Google Ads customer — pick the account you want to send conversions to. The dropdown is pre-filled from your Google account.
- Conversion action — pick from the dropdown of enabled conversion actions in that account.
- Event name filter — which event on your site triggers this action? (e.g.
Purchase,Lead,PhoneCall). We’ll pick the right event in Step 4.
Conversion action dropdown is empty?
That means the picked Google Ads account doesn’t yet have any conversion actions. Go to ads.google.com → Tools → Conversions → + New conversion action. Create one (Purchase / Lead / Phone call — whatever you want to track), come back here, and the dropdown will list it.
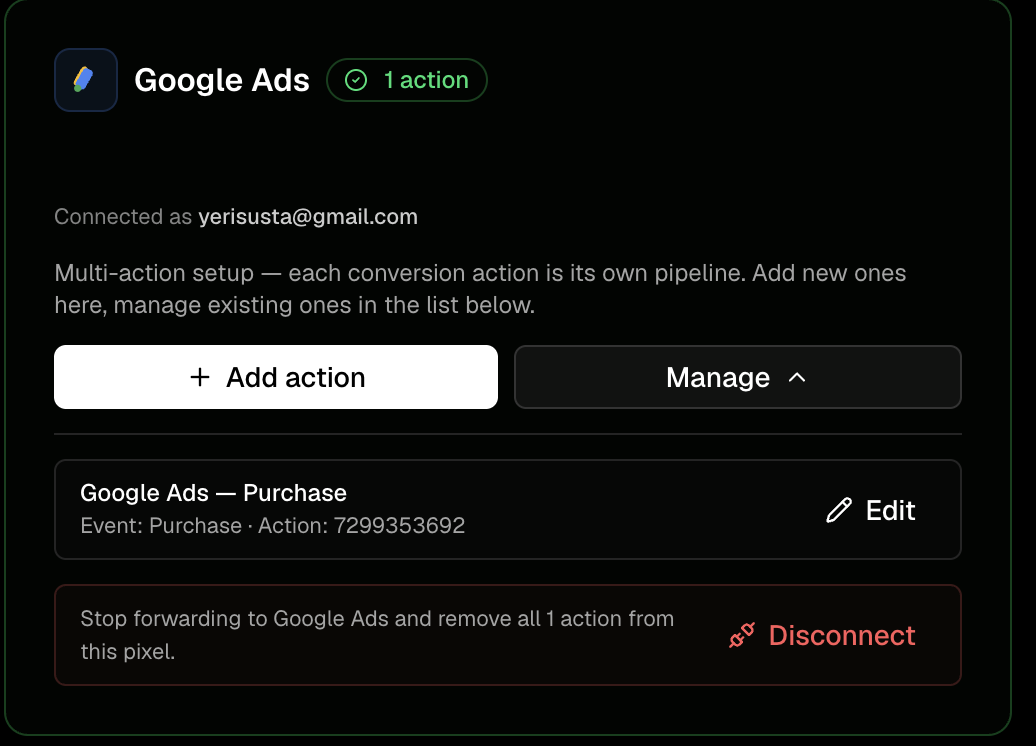
3.6 — Save the pipeline
Click Save. The Google Ads card now shows your new conversion action with a green badge. Repeat steps 3.4 to 3.6 for every conversion action you want to track on your site (Purchase, Lead, PhoneCall, etc.) — one pipeline per action.
✓ Google Ads is connected on the AdsPing side.
AdsPing now knows which Google Ads account — and which conversion actions — should receive events from your site. Next, we’ll pick the actions and paste the matching snippets on your site.